Designing Your Garden: Bubble Diagrams
MY SIMPLE STEPS TO CREATE A BUBBLE DIAGRAM
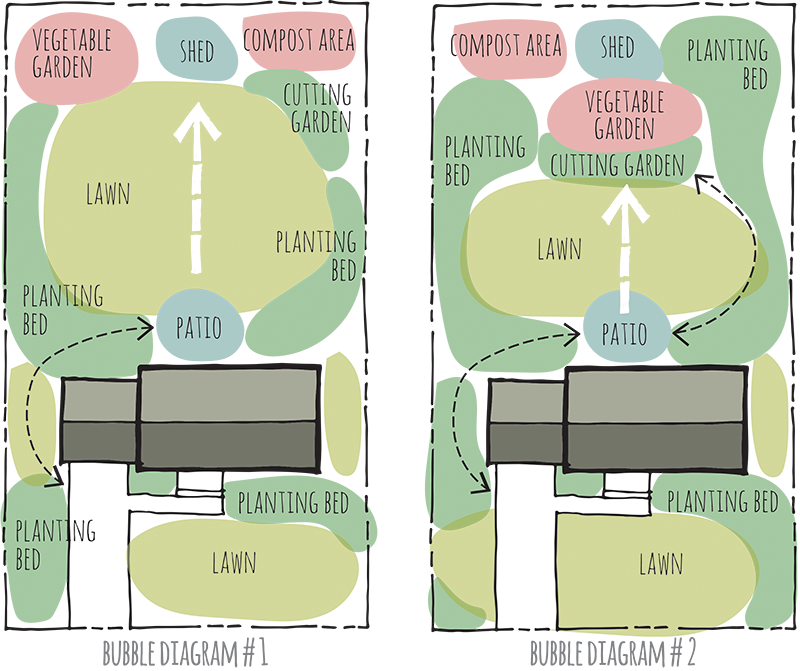
1. Make a list of your program requirements | This is simply a list of what you'd like included in your final design. My wish list for the functional diagrams above included: a patio, vegetable garden, cutting garden, compost area, shed, lawn space, and lots of planting beds.
2. Make "bubbles" for each of those elements and start arranging them on your site | What spaces should be adjacent to other spaces? Maybe the compost area and vegetable garden should be close or perhaps you need a vegetative screen between your patio and a busy road. Don't forget to include existing elements (like plants and other architectural features, so they are incorporated into your final design).
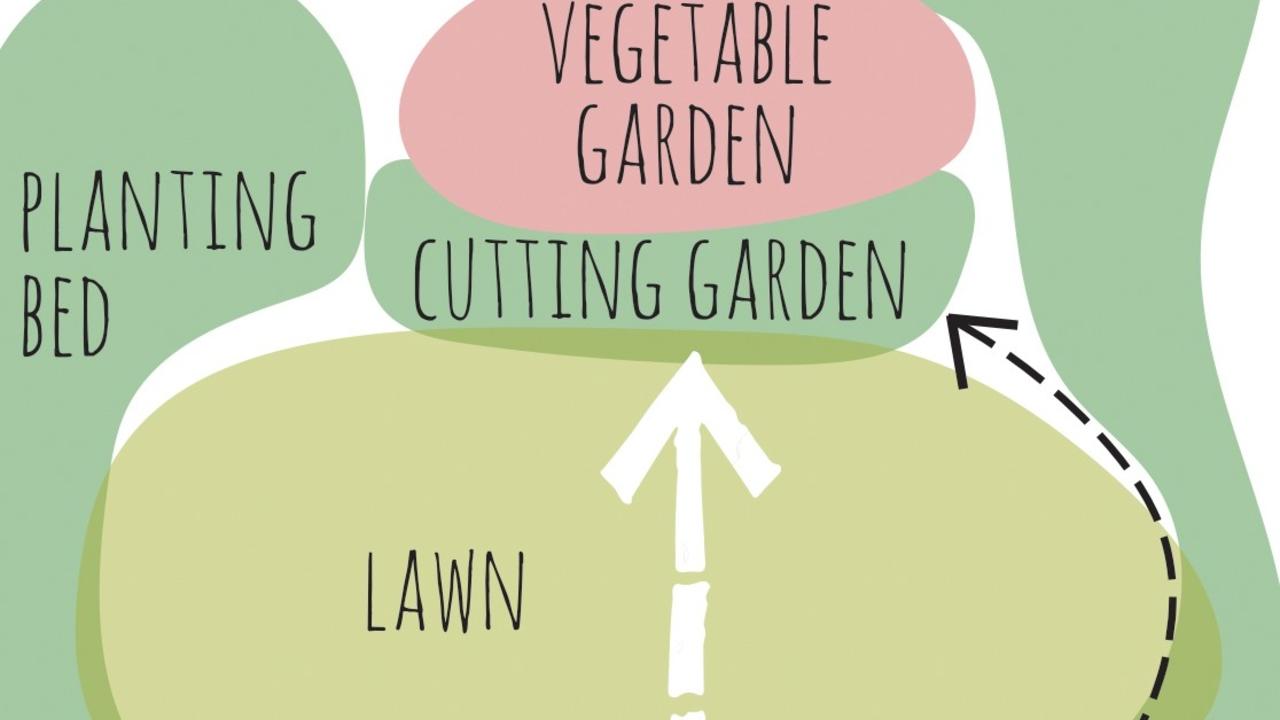
3. Think about how your spaces connect to each other | Will your spaces be connected with a physical path or will they simply relate to each other with an imaginary axis? Represent these with solid or dashed arrows and maybe even use asterisks for focal points. Create symbols that make sense to you.
4. Assign every portion of the ground plane a particular use | Don't leave blank spaces, otherwise you'll struggle with it's use later.
5. Include a freehand, informal graphic style | These are rough sketches, so feel free to go through many options. Use tracing paper over your base plan and keep layering until you find the combination you like. The two above show the same site with different bubble diagram options. Ideally you'll explore several more. Rarely is your first diagram the best one.
6. Don't include individual plants or particular materials | Stay general and loose. Your goal is to simply figure out the relationship of spaces. You can add this detail later.
Check out my post on garden structure to explore how to add definition to these bubbles. I hope you enjoy this process as you begin to organize your garden spaces!